VisibleBlue

Bowser Costume, Part 3 – The Head October 25, 2013

Filed under: DIY,Kids — VisibleBlue @ 12:13 am
Tags: , , , , , , , , ,

Alright, we’re in the home stretch now! If you missed part one (the body) or part two (the shell) of the Bowser costume series, head that way and we’ll meet back here! If not, welcome to the most nebulous, frustrating, and free-form part of the costume – Bowser’s head! If I were to do the whole costume over again, I definitely would have started with this part, when I had some momentum! Now, a week away from Halloween, I just want to get the damn thing done. And sadly, it shows. Oh well, here we go!

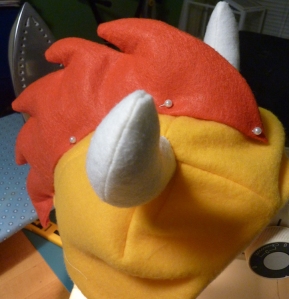
Remember our Simplicity 2506 pattern? We’re going to use that again for the head. Use the pattern for the dragon head – but don’t include the spikes. It’s basically just a regular hood.  Make sure you use the green fleece for his head – it’s not gold like the rest of his body. (Yep, I ended up making two hoods for that reason.) Also, cut out and sew the horns (using the cream felt) from the devil costume. Stuff, pin, and sew them onto the hood. You should set them slightly wider apart than I did.

Draw the hair shape, but be sure to leave room for the seam allowance!

Draw the hair shape, but be sure to leave room for the seam allowance!

For Bowser’s hair, draw a shape on the red felt that roughly follows the curve of the hood, with spikes on top. Make sure to account for seam allowance on the spikes when you draw them. Stack two layers of the felt and cut out your shape. Clip and fold up the bottom 1/4″ for a nicer finish (see fig. 1). Sew along the the top of the hair, turn, and press.  Stuff the hair with polyfill and pin to your hood. Faster option – instead of the spikes included in the pattern, cut out the shape of Bowser’s hair and sew it in the center of the hood, just like the pattern does with the spikes. All that hand sewing takes quite a lot of time.

Fig. 1 - Sew along the unfolded edges.

Fig. 1 – Sew along the unfolded edges.

Yes, astute reader, the hood should have been green! That is why it looks like an evil rooster.

Yes, astute reader, the hood should have been green! That is why it looks like an evil rooster.

While you have the red felt out, cut out two eyebrow shapes, like this:

eyebrows

Also cut out the parts of the eyes (two of each, obviously.) You’ll need red circles for the irises, smaller black circles for the pupils, and tiny white circles for the “shine”. Cut four sort-of-ovular shapes out of the white felt for the eyeballs. Sew two of them together, leaving space to stuff, and trim the edges. Firmly stuff the eyes and close the gap. I glued the parts of the eyes together, and ran a needle and thread through the iris where the “shine” would be just to ensure that they would stay put. Sew the eyes into place, and glue the eyebrows on top of them. Faster option – 2-D  eyes would be perfectly lovely, too!

The scale will be totally dependent on the size of your hood, but in my version, the irises are a little larger than a nickel.

The scale will be totally dependent on the size of your hood, but in my version, the irises are a little larger than a nickel. Just eyeball it. Ha! Get it?

The longer I look at this, the creepier it gets.

The longer I look at this, the creepier it gets.

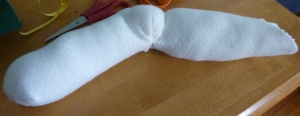
Now, the mouth. Ahhh, the mouth, my biggest challenge, and biggest disappointment. I’m sure I’ll spend the next week tweaking it to try and get it to look right, but for now, here’s what I have. I really had no idea where to start. My initial idea of molding felt around ping pong balls didn’t really pan out, so I had a glass of wine or two, didn’t come up with any brilliant ideas, and decided just to make a tube out of the cream felt.  I wanted to at least have some definition in the nose, so I sort of folded the edges in and sewed them in place. This created kind of a “point” at the bottom, which I folded back and sewed down. I wish I could explain that better, but I’m really not sure how.

This is the point at which I knew this would not end well.

Underside of the mouth. It looks strikingly like a sock. This is the point at which I knew this would not end well.

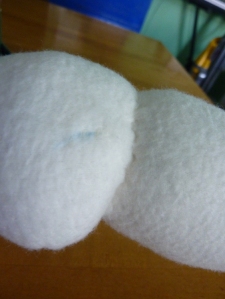
Closer version of the mouth - the blue is where nostrils would go.

Closer version of the mouth – the blue is where nostrils would go.

teethI stuffed the center firmly and the ends more loosely. I cut out three sets of triangles for teeth from the white felt, and sewed them onto the bottom of the mouth, pressing them down at the seam. Then I closed up the edges and sewed the whole thing to the hood.

So here are the problems I’m left with: The mouth is too low and makes it difficult for my son to see out. I’m going to add some elastic to the back of the hood in hopes that it will pull the front up a bit. Also, the mouth is too wide. I want it to fold down in the middle and up at the edges a bit. Tying the ribbons under his chin helps a bit, but it’s not what I had envisioned. Anyone have any ideas? I have a week left – I’d love to hear them!

Doing his best Bowser impression.

Doing his best Bowser impression.


Bowser Costume, Part 2 – The Shell October 17, 2013

DIY Bowser Shell for Costume

Did you miss part one of the Bowser costume series?

In part two, we’ll cover just the shell. This is a really flexible project and could easily be adapted as a pillow or turtle shell if that’s what you’re looking for. For a pillow, I’d advise against using the felt and instead stick with fleece or something more durable. I know I’d be making a million of these little Bowser shell pillows if there wasn’t so much hand sewing involved! The materials required for this project are discussed in part one.

A note before we begin – I was making this up as I went along, and did some things that perhaps weren’t necessary. Do as I say, not as I do!

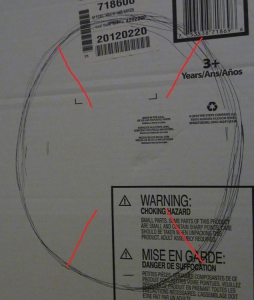
First, you’ll need a large piece of cardboard. This will help with the structural integrity, as well as limit the amount of stuffing you need. If you’re making a pillow, you can skip this step! Determine the size of the shell (for a costume) by measuring the distance between the neck of the jumpsuit and the top of the tail. Sketch an oval roughly that size on the cardboard. You don’t need to be a perfectionist about it – this will all be hidden under quite a lot of material and stuffing. Cut out the oval and make four cuts, shown in the picture as red lines, where the corners would be if it were a rectangle. This will help us shape the shell.

Cut out the oval, and make cuts along the red lines.

Cut out the oval, and make cuts along the red lines.

Overlap the cut edges to pop the center of the oval up a bit and tape them together, as in the photo below. Place your oval on a doubled layer of green fleece and cut about two inches outside the oval. (The photo shows more than two inches, but the extra wasn’t necessary.)

green

Cut a piece of iron-on batting just slightly larger than the cardboard. Adhere this to the wrong side of the fleece that will be the top of the shell.

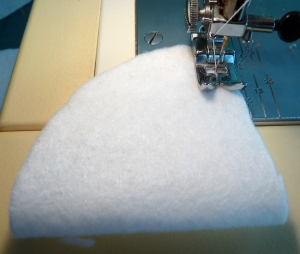
Now let’s work on the spikes. If you’re making a turtle shell, you can skip this step, unless it’s a particularly bad-ass turtle. Cut ten half-circles out of felt. The necessary size will vary based on the size of your shell, so try making them out of paper and setting them on your shell until it looks right. Remember that your felt spike will be a bit smaller after sewing and turning it, so make it just a little larger than necessary. Bowser has four spikes down the center and three spikes on each side of his shell. Fold each half-circle in half, corners together, and sew along the straight edge. Clip the point and turn the spike inside out.

My half-circles were about 4.5" in diameter.

My half-circles were about 4.5″ in diameter.

spike2

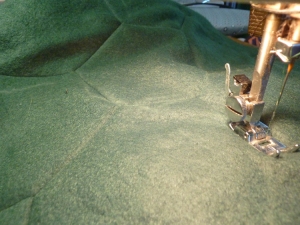
Lay the green fleece with the batting on top of your cardboard oval, right side up. Place your spikes in their desired positions, if you’re using them. With white chalk, draw hexagons on the fleece – around the spikes or however you like. Remove the spikes and machine sew along these lines and through the batting.

hex quilt

When I did the next part, I sandwiched the two layers of green fleece, right sides together, and sewed around the edges. Then I turned it inside out. What I would do differently is stuff the spikes, pin them in place (bottom edges turned under slightly, seams facing the bottom of the shell), and hand sew them on. Then I would have basted the two layers together, WRONG sides together, with the cardboard and stuffing in place. There is really no reason to turn the shell inside out since the raw edge will be encased anyway, and it would have been a lot easier to sew the spikes on with access to the back, not to mention sewing through half as many layers for the edge. If you choose to do it the hard way for some reason, be sure to leave a gap large enough to insert the cardboard oval and stuffing. Don’t be surprised if your shell looks like a giant misshapen blob at this point – the binding should clean and tighten it up a bit!

pinspikes stuff

For the binding, we’re basically going to make some giant single fold bias tape (though I didn’t cut mine on the bias). Measure the circumference of the shell and add four or five inches. This is the length of felt you should cut. The width will just depend on how fat you want your binding. My tape was about four inches wide, plus an additional 1/2″ on each side. Fold and press the edges toward the center.
binding
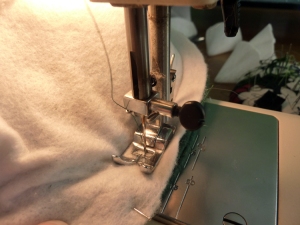
If you need a little help sewing bias tape on a curve, here’s a nice video that explains it. It’s worth a watch before trying this, as this is the method I used. First, unfold one edge of the tape and pin it to the top of the shell, right sides together, all along the edge of the shell. Start at the bottom of the shell. When you reach your starting point, trim the excess tape and make sure to fold the end of the tape under a bit, positioning the folded edge under the raw edge so you end up with a nice seam. Sew the length of the tape, staying right on the fold line.

pinedge sewedge

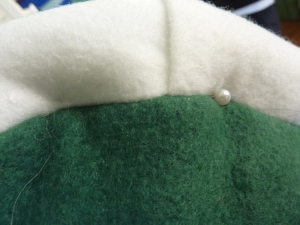
Fold the tape over to the other side and stuff it with polyfill, pinning in place. Stitch it closed along the seam. You may need to do this by hand – I did, but of course I had more layers to sew through after turning the shell and my machine couldn’t hack it!

Stuff the edge pretty firmly

Stuff the edge pretty firmly

You can see the folded seam where the ends of the binding meet.

You can see the folded seam where the ends of the binding meet.

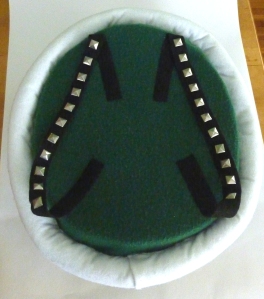
We’re in the home stretch now! Remember those upper arm straps we made back in part one? All we need to do is sew them in place! (And hey…if you made a pillow, you’re already done!) Grab your child (or dog, or whoever you’re making the shell for – I have to admit I’m pretty tempted to make a Koopa Paratroopa costume for my Corgi now) and pin the straps into place (think backpack). Hand sew them, and that’s it! Of course, I know there are red rings around Bowser’s spikes, but that’s just not a priority for me right now. I imagine it wouldn’t be too hard to add some red cord around the spikes if you just have to have it! I’ll see you in a few days for part three (Bowser’s head) – assuming I finish it!

straps


Can a 3-Year-Old Be King of the Koopas?

Filed under: DIY,Kids — VisibleBlue @ 12:02 am
Tags: , , , , , , , , ,

**2019 Update** The Simplicity 2506 pattern I used for this costume is no longer done2available. I haven’t tried it, but Simplicity 1765 looks like a good replacement option. Please let me know if you try it out!

**2017 Update** Every year I get a few requests to sell this costume or make new ones, and I regret that I am unable to do so. I wish you all the best of luck in finding another costume or making one for yourself!

Halloween is a busy time here at VisibleBlue. I get more traffic during October than any other month, no doubt thanks to the Cookie Monster costume series. But hey, that’s not really a surprise, considering I’m a terrible slacker during the rest of the year and I’ve updated….oh….only 4 or 5 times since then. Pathetic! Now I’m just going to go ahead and drum up some more Halloween traffic with this latest series – homemade Bowser costume!

This year, after some particularly inspired costume ideas (“tree,” “floor,” “mystery”) my son landed on Bowser – you know, the villain from the Super Mario Brothers franchise. Why pick a villain? Straight from his mouth: “I like monsters, and Bowser has spikes and I don’t have spikes.” Let’s remedy that, shall we?
I thought this would be a fairly simple purchase. I see tons of Marios and Luigis every Halloween, so surely one of the most recognizable video game villains of all time would have his own costume! As it turns out, he does not. The only one I could find was a full-size adult mascot-style costume. Hey, at least I have some practice at this costume-making thing!

I decided to break the costume down into parts, and I’ll do the same with these posts. The first post will focus on Bowser’s body, the second part of the series will be his shell, and in the third, we’ll construct his head. I’ll try to get the other two posts out before the week is over, but I’m actually still working on the head as we speak.

So let’s take a look at the main body parts. Hey, look! He’s basically just a dinosaur. Now where have I seen this costume before…Oh yeah! My new favorite purchase, the Simplicity 2506 pattern! Last year I modified the devil pattern to make Cookie Monster, and this year I tweaked the dinosaur pattern a bit and came up with a pretty passable Bowser! I used gold and cream fleece for his skin, and felt for everything else. I followed the pattern mostly as directed (minus the head), with a few exceptions.

The Materials

For the whole project – not all of these will be used in part one. This list assumes you’re making the costume for a small child – for a larger kid or adult, you’ll need to increase the yardage accordingly!

  • Gold fleece, as per the pattern
  • Cream fleece, as per the pattern (contrast)
  • Green fleece (about half a yard)
  • Black felt (one sheet)
  • Red felt (two sheets)
  • White felt (one sheet)
  • Cream felt (about half a yard) ( I used white, but wish I had bought cream instead.)
  • Batting (1/2 yard)
  • Polyfill (10 oz.)
  • Thread (green, black, cream, red, gold)
  • Notions as per the pattern
  • Studs or spikes (I salvaged mine from an old belt-turned-bag, but I have seen them at Jo-Ann Fabric)
  • Black ribbon, nylon webbing, or another material suitable for straps

The Feet

Stitching toenails

Three toenails per foot!

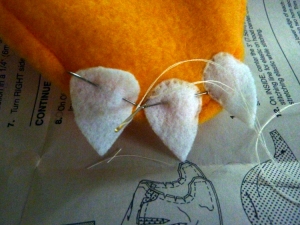
Like last year, I omitted the bottom of the booties so he can wear them like spats over his shoes. A strip of elastic holds them to his feet. I cut six teardrops out of white felt and sewed them to the front of the booties for toenails.

The Stomach

I added a few extra lines of quilting to the stomach, though in hindsight, I only needed to add one. I got a bit overzealous, I guess!

The Tail

Unfortunately, I didn’t take any photos of this process, but it wasn’t too difficult. Where the pattern directs you to cut the tail spike pieces, I chose to use white felt, and I only cut two pieces. I sewed and turned them like directed, but stuffed them firmly before sewing them into the tail. I prefer the 3-D spikes over the flat ones.

The Jewelry

4 upper arm pieces (to be joined into 2 strips), 2 wrist pieces, 2 neck pieces (to be joined into 1)

4 upper arm pieces (to be joined into 2 strips), 2 wrist pieces, 2 neck pieces (to be joined into 1)

Bear with me a bit, because here’s where the science goes out the window and the art comes into play. To make Bowser’s bracelets, necklace, and arm bands (which actually are not used in this section, but will come back in the shell tutorial), I cut strips of black felt approximately one inch wide. If you prefer, you could use something a bit stronger than felt for the upper arm straps, as they will be supporting the shell. If I had to do it over again, I might use ribbon or nylon webbing.) For the bracelets, I measured the distance around the wrist and was able to cut the felt an inch or so longer than that measurement. For the upper arm straps and neck, I had to sew two strips together to get the appropriate length. Here’s a photo of the strips after cutting – wrist pieces are labeled in chalk with “W”, upper arm pieces with “U”, and neck with “N”. I just guessed on the length of the upper arm pieces – you want to end up with something around the same length as backpack straps. For the spikes, I salvaged an old bag from another lifetime. They may not be as pokey as Bowser’s, but you get the idea. Plus, my son has to wear this to preschool.

It is.

This may or may not be me.

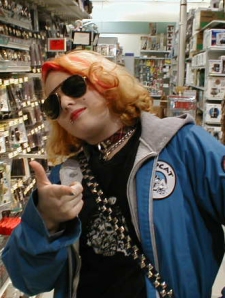
Did I think, 12 years later, I'd be using these on a Halloween costume? Not in a million years.

Did I think, 13 years later, I’d be using these on a Halloween costume for a kid? Not in a million years.

After putting all the studs into the felt (they have little prongs on the back), I hand sewed the bracelets onto the costume wristbands, and the necklace onto the neckband, leaving about half an inch of overlap. I added a piece of hook and loop tape to each side of the necklace.

Bring on the shell!

It'd be cuter with a kid in it.

It’d be cuter with a kid in it.