I am not afraid to say this: sometimes I am a very sweaty girl. I am afraid, however, of smelling like one. When I first read about solid perfumes, the concept blew my mind. While not new by any stretch of the mind (I’m told the ancient Egyptians used them), somehow this slipped by me. It seems so obvious! The last thing I want rolling around in my purse (or more likely these days – diaper bag) is a fragile glass grenade full of noxious, room-clearing eau de toillette. Unfortunately, finding one in person, not to mention one in my price range, proved to be a fool’s errand. Like most things in this category, I asked myself, “Can’t I make this at home?” As it turns out, yes! Not only is it potentially very cost effective (depending on your choice of ingredients), but it’s fun! I felt like an alchemist in my kitchen this afternoon, and any project that gets me out of stay-at-home-mama-mode and into magical-ancient-mad-scientist-mode is a definite win in my book.
What do you need? Basically, three ingredients: beeswax, a carrier oil, and a scent. A few common kitchen items. Something to put the finished product in. This is the bare minimum – you could get pretty elaborate with your recipe and setup, but that is nowhere near my area of expertise and far outside the scope of this post.
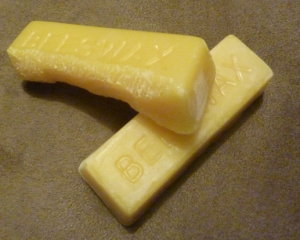
For my ingredients, I used beeswax purchased at my local farmer’s market, coconut oil that I had on hand (almond oil works well as a carrier oil), and a perfume oil I wear occasionally. After my first batch, I wanted to try to turn an existing perfume into a solid, so I also used some of that (more on that later.)
The process: I don’t have a double boiler, so I set a glass bowl atop a pot with an inch of boiling water. I combined one heaping teaspoon of shaved beeswax and one teaspoon of coconut oil in the bowl, stirring with a wooden skewer until they were completely melted. At that point, I just added about 15 drops of my perfume oil and stirred. You could use any combination of essential oils or perfume oils you wanted, but I’m no expert at creating scents, so I can’t really comment any more on that. There are tons of resources available to those who are interested in perfumery!
I wiped the water off the bottom of the bowl and poured the liquid into my containers. I used an old, empty compact and a tin that once held mints. You can use any small pots or tins you might have lying around, as long as they are airtight and won’t melt when you pour the liquid in. You can even use empty lip balm containers for a super convenient twist-up stick! These containers are all available new, and often in bulk, at many online retailers – just do a quick search. The perfume will set pretty quickly and will be ready to go in less than an hour.
Despite the plethora of existing tutorials on creating solid perfumes, I couldn’t find much about using existing perfumes to get them into solid form, so I decided to just try it for myself. Since perfumes contain alcohol, I wasn’t sure if the oils would react strangely. I am happy to say that it seems to work just fine. I sprayed about 6 or so spritzes into the bowl (duh, make sure it’s away from the stove, especially if you use gas!) and stirred it in. It really stunk up the kitchen for awhile (maybe I should have used a perfume my husband likes?) and I suspect the finished product will be less intense than the original, but that’s fine by me since I find most perfumes to be overwhelming! I don’t know how it’ll last in the long run, but it was definitely worth trying. Even if I have to make it again in a year, the process is so quick and painless that it’s really worth it.


