VisibleBlue

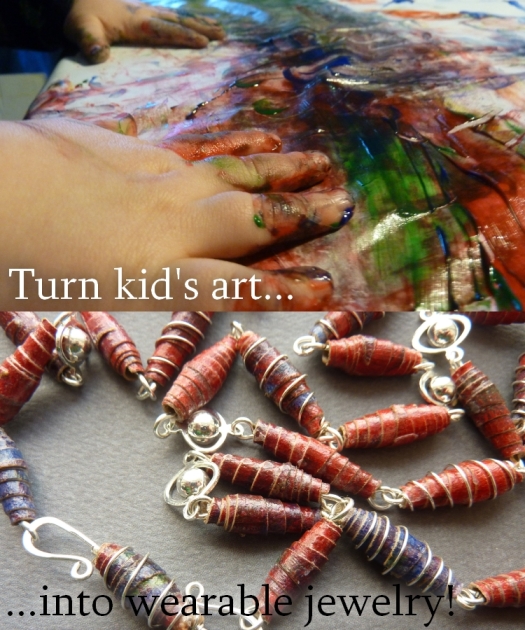
Turn your child’s art into wearable jewelry February 29, 2012

Filed under: DIY,Jewelry,Kids — VisibleBlue @ 1:40 pm
Tags: , , , , , , , , , , , , ,
Before and After

Hey, at least it's not made of macaroni.

I don’t know about you, but I always feel bad getting rid of my son’s art. Sure, I could just scan it all and save it digitally (no paper clutter!), but why not turn it into something I can wear and look at all the time? He’s not even two yet, so his art projects are still very…abstract. In other words, perfect for turning into jewelry.

Cut triangles

An assortment of cut triangles

His latest masterpiece was a fingerpainting we made on the paper that forms a tube inside cheap wrapping paper rolls. It’s really thick, so it didn’t bleed through, and I just love finding another use for something we would otherwise just recycle. After it was thoroughly dried, I cut it into little triangles with a craft knife. The triangles were about 3 inches long, but you don’t need to be too perfect when you cut them. I just eyeballed them all – some have thicker bases, some are longer or shorter, some are a little slanted. The width of the base will determine the width of your bead, so just cut them about as wide as you’d like your beads to be. I think it actually looks better when they’re all different, but feel free to cut them all the same for a uniform look.

Roll the bead

Step three - go get a manicure before posting pictures of your hands on the internet

The next step is to roll up the paper triangles, starting at the widest point, around a skewer or other thin object. Roll it very tightly, and use a dot of glue (I used superglue because it dries so quickly) to affix the point. Paint on some Mod Podge gloss for a nice, shiny finish. Let them dry on a hard surface. Voila! At this point, you can string your beads however you like and make a pretty nice bracelet or necklace. In the above example, I linked mine together with some simple silver wire and a few spacer beads. I wrapped about a third of the paper beads in 26 gauge silver wire.

Finished Beads

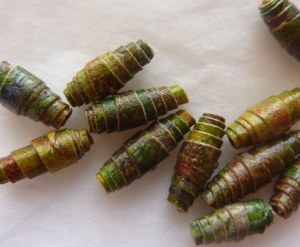
So shiny and candy-like....mmmm...

This would make a great mother’s day (or grandmother’s day) gift idea. Don’t have any art to work with? This method works with all kinds of paper – used calendars, wrapping paper, and torn pages from books or magazines, just to name a few. You could even upcycle extra wedding programs or invites for a special piece of jewelry!
 

Fav Baby/Kid DIY Sewing Tutorials October 18, 2011

Filed under: DIY,Kids — VisibleBlue @ 11:09 pm
Tags: , , , , , , , , , , , ,

Tonight, I’m working on a Halloween costume for my son – he’s going to be an Ewok. Last year, through some errors but great customer service from buycostumes.com, we ended up with two meerkat costumes – one of which is just the right size for him to wear this year. With a little bit of  upcycling, I’m using my old homemade Moby wrap for the other half of the costume. If it turns out, I’ll make another post on that. (Here’s hoping! I don’t want to buy a new costume this year!)

Anyway, this got me thinking about some of my favorite projects I’ve taken on in the last two years, and a few I haven’t tried yet. In no specific order:

Upcycled Boy's Hat

It looks adorable, when he keeps it on!

Upcycled hats– These adorable hats are made with old t-shirts. I even ended up making one for my husband, and lined it in fleece (though I haven’t seen him wear it yet!) Here’s my son in one.

Upcycled wool soakers (waterproof covers to go over cloth diapers)- I made several kinds, and they all work great. Just be sure to use totally natural wool – the cashmere soakers and longies  I made are super soft, and the merino wool and lambswool soakers are very absorbent. This is a great use for sweaters that were accidentally tossed in the dryer. You can also find cheap ones at thrift stores – some small holes are okay, if you can cut around them. Be sure to lanolize them before you use them! Here are two different tutorials: longies, and shorties.

A big list of boy’s clothes – I haven’t gotten around to making any of these yet, but several of these are on my to-do list!

Loads of (mostly free) felt food patterns and tutorials – I’m going to start making these once I think The Boy won’t try to eat them…